Please excuse any untidiness while I makeover my blog among other projects and endeavours.

Tuesday, May 1, 2012

A2Z Scraplets April Releases

I was away in Perth while the April A2Z Scraplets were released so here is a quick recap of the goodies I got to play with from the new releases. You can see all the amazing new releases on the A2Z Scraplets website and blog.

First up is a layout of my Lil Miss Sunshine using the new Shapes - Starburst 2 Large. I actually cut my starburst centre piece up so it could be adhered to a 12x12 page to create the background shown. I adhered them to a 12x12 piece of Chipboard so it would be strong and sturdy enough for the layering I had planned.

After the  chipboard starburst pieces were all dry on the 12x12 Chipboard Background, I have then added a coat of White Gesso over the entire surface. While it was still wet, I then added a layer of Cheescloth and a touch more Gesso using a Brush in a messy rough pattern so that some of the Cheesecloth curled and bunched up into wrinkles.

The next step was to Glimmer Mist this array of beautiful  colours.

Checkout the texture of that Cheesecloth and Chipboard!


The flower cluster had some additional Glimmer misting added to help it mesh into the colour bursts better.


Next up is a layout I created for a dear friend using the New Catnapping Chipboard Title.
 Links to Products: Catnapping

For this layout I have used the amazing 7 Dots Studio Dreamer Collection of Papers and Stickers.

The Chippie title got a coating of Rock Candy Crackle Paint from Tim Holtz and then some inking and spritzing over the top with some glimmer. 


This next layout was created using both the Sweet Memories Title Chipboard and the Starburst Large Shapes.
Links to view Products: Sweet Memories & Starburst


For this layout I have used the amazing Pink Paislee Collection Indigo Bleu! I am just in love with this collection and particularly the fact that it could easily be used for boys and girls!


This chipboard title was a bit of a disaster for me and what I wanted to do didn't look right with the layout colours so after layering and layering of Glossy Accents and a tonne of other mediums, I finally went with this amazing Perfect Pearls finish and I think it works perfectly!

The background Bazzil cardstock was scrunched up into a little ball (hubby did it for me because I was too weak it seems for the Bazzil LOL) and then ironed out flat. After this I have used the Starburst Large Chipboard Shape as a Stencil and sprayed some White Chalkboard Glimmer Mist over the area where I knew the photo would be sitting. I love the subtle starburst effect.

Checkout my handmade denim flowers alongside some Indigo Bleu Pink Paislee Die Cut Shapes curled up and some Tim Holtz Ideaology.


Next up is a layout of my gorgeous cat Buster. Nawww isn't he a cutie? 
Links to view Products: Cat-titude

For this layout I have used the Bright Side collection from My Minds Eye along with the new release Chipboard Title Cat-titude from A2Z Scraplets.

The chipboard title had spots of Various coloured Liquid Pearls which were then marbled together using a pin.

The background has had a closeup spritz of White mr Hueys Spray and then I have held the paper upright to let it drip down the paper.

Lots of Washi Tape, stitching, transparencies & staples added to this over rustic effect.


Next up is a layout of my husband and I using the new Hanging Heart.


For this layout I have used some more papers from the amazing 7 Dots Studio Dreamer Collection.
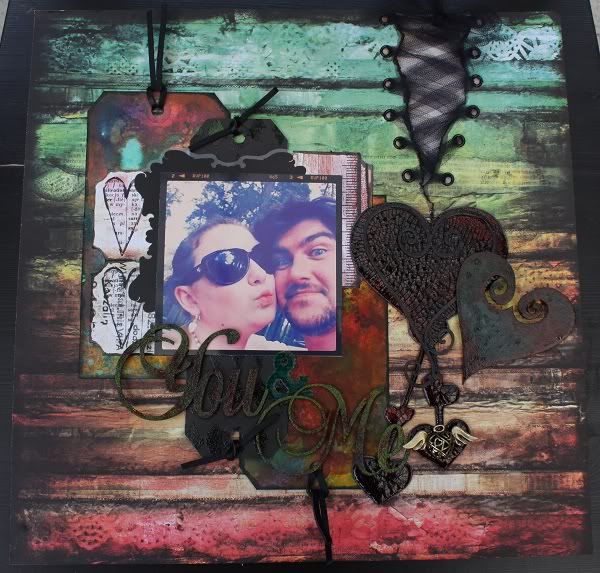

The hanging hearts received a coat of Tim Holtz Rock Candy Crackle Paint followed by some Distress Stains in various colours. The heart shapes were simply coated with rough splodges of Glimmer Glaze.

The You & Me title was coated with some  WOW Embossing Powders and the & symbol had an unfortunate accident so was replaced with a Glimmer Glazed Sticker & symbol LOL.

This tulle was hand dyed from white tulle I had in my stash. I then simply tore off some paper and inked the edges. Then with my cropadile I added some Black eyelets to thread the lace through. 

Lots of fabulous ink work and embossing on those shipping tags in the background.

Here is another angle shot of those beautiful hearts! 

Next up is an 8x8 layout I have created using the new Starburst Shape Large.
Links to Products: Starburst & Daughter Small


For this layout I have used the remainder of my Starburst Large Shape as a frame. Firstly I have sprayed the entire starburst stencil with water and then rolled up each of the starbursts using a pencil. I then zapped it straight away with a heat tool to ensure it dried and stayed the way I wanted it to. I gave a quick Spritz over the top of Crushed Shells Glimmer Mist and then heated again with my heat tool. After it was completely dry, I adhered it to the background paper that I had picked out and painted the edges with Tattered Rose Crackle Paint. A final Glimmer Mist Spray was added when the crackle paint was dry so that the cracks showed up better.
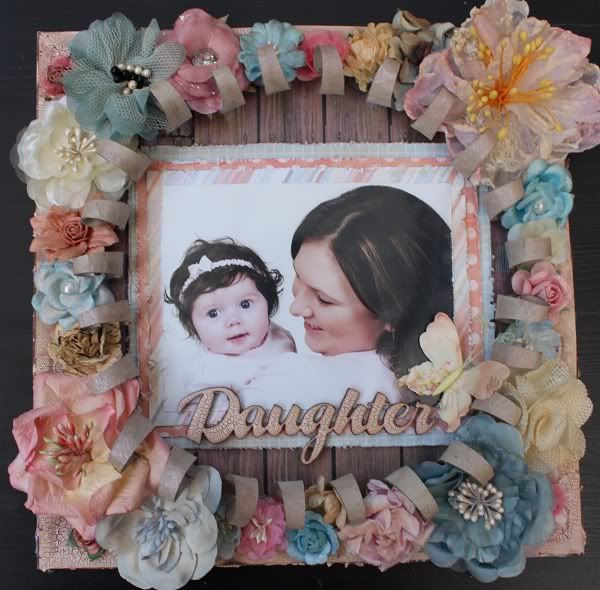
The Daughter Chipboard Title was also given the same Tattered Rose Crackle Paint followed by Glimmer Mist spray over the top. All the patterned paper has a hint of glimmer mist added also.

I have added a tonne of flowers around the edges of this layout. It truly is breathtaking

Closeup of the curls.

Closup of the Crackled Edges and more curls

Next up is a very very simple layout for me but I just don't feel that it needed anything else done to it. I have used the new Eyes are the Windows to the Soul Chipboard which is soooo pretty.
Links to View Products: Eyes are the Windows to the Soul

For this layout I have used the gorgeous new Spring Jubilee Collection from Pink Paislee.
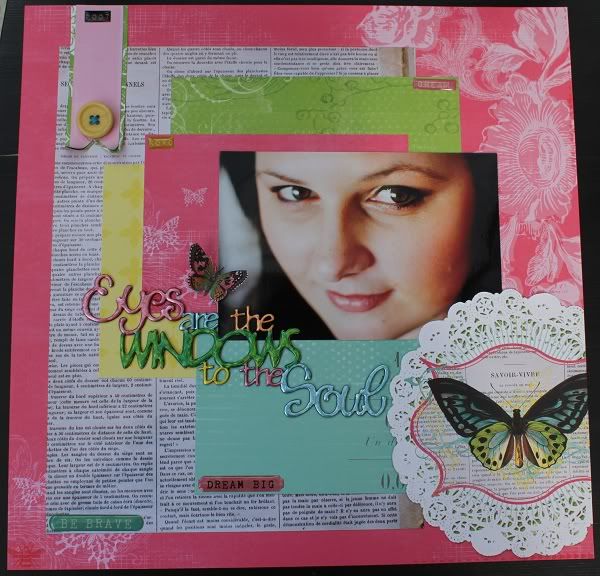
The chipboard title has a beautiful array of Liquid Pearl Colours added and some marbling of 2 tone green on the word WINDOWS.

This beautiful Doiley was cut from another patterned paper in the collection

A simple button and date was all I felt that was needed for this layout however there is hidden journalling on the back of this tag as well.


WOW what a crazy amount of inspiration and photos! So sorry if they took forever to load for you but I hope it was worth the wait. 

Thanks for stopping by and until next time....Happy Scrapping!

Amy Prior xxx


A2Z Scraplets May Sketch Challenge

Hi there! Have you seen the new sketch challenge over on the A2Z Scraplets Blog? I just adore all Pagemaps sketches so of course this month's sketch choice by Holly was no different. 


I decided to use the beautiful soft tones in the Songbird Collection from Prima for these beautiful Instagram photos that I took sky high somewhere over the heart of Australia. 


There is lots of beautiful texture on this layout that was created with distressing and adding Cheesecloth and Embossing.


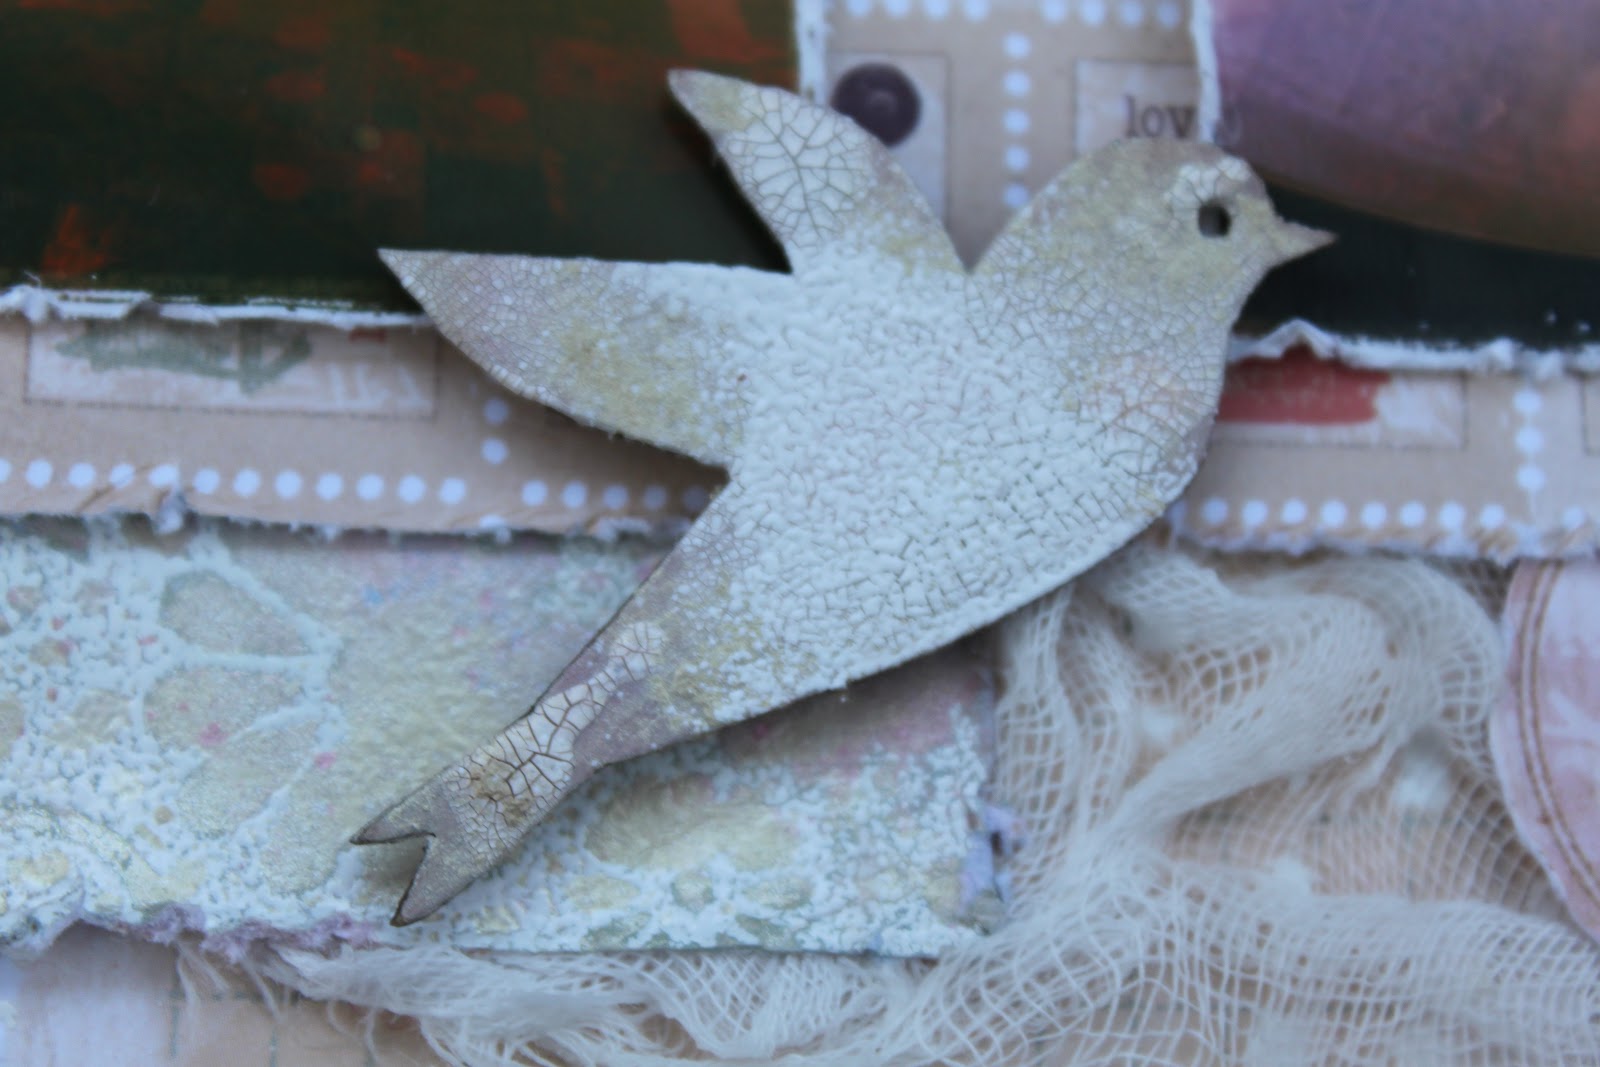
The Beautiful A2Z Scraplets that I have used for this layout are 3 little birdies from the Shapes - Birdcage 5 set. I have used the Birdcage the leftover 1 bird on a seperate layout which just shows how amazing these scraplets are for value!


The birds have had a rough layer of Crackle paint added followed by some layers of inking and then topped off with some WOW White Embossing Powder. These are all very random and I just love the shabby overall effect it created. 


The Cheesecloth has been glued down using Helmar PVA Glue to ensure that id dried clear. I really wanted a rough look for the cheesecloth so I went to town ripping, tearing and poking holes before I adhered.


A touch of glimmer was added by using Perfect Pearls and water over this Embossed Stamped image which of course resisted the water.


Thanks so much for looking and be sure to head on over to the A2Z Scraplets Blog to checkout the amazing designs from the rest of the incredible Design Team!

Until next time....Happy Scrapping!

Amy Prior xxx

Monday, April 30, 2012

Shabby Tealight Candle Holder with the WOW factor

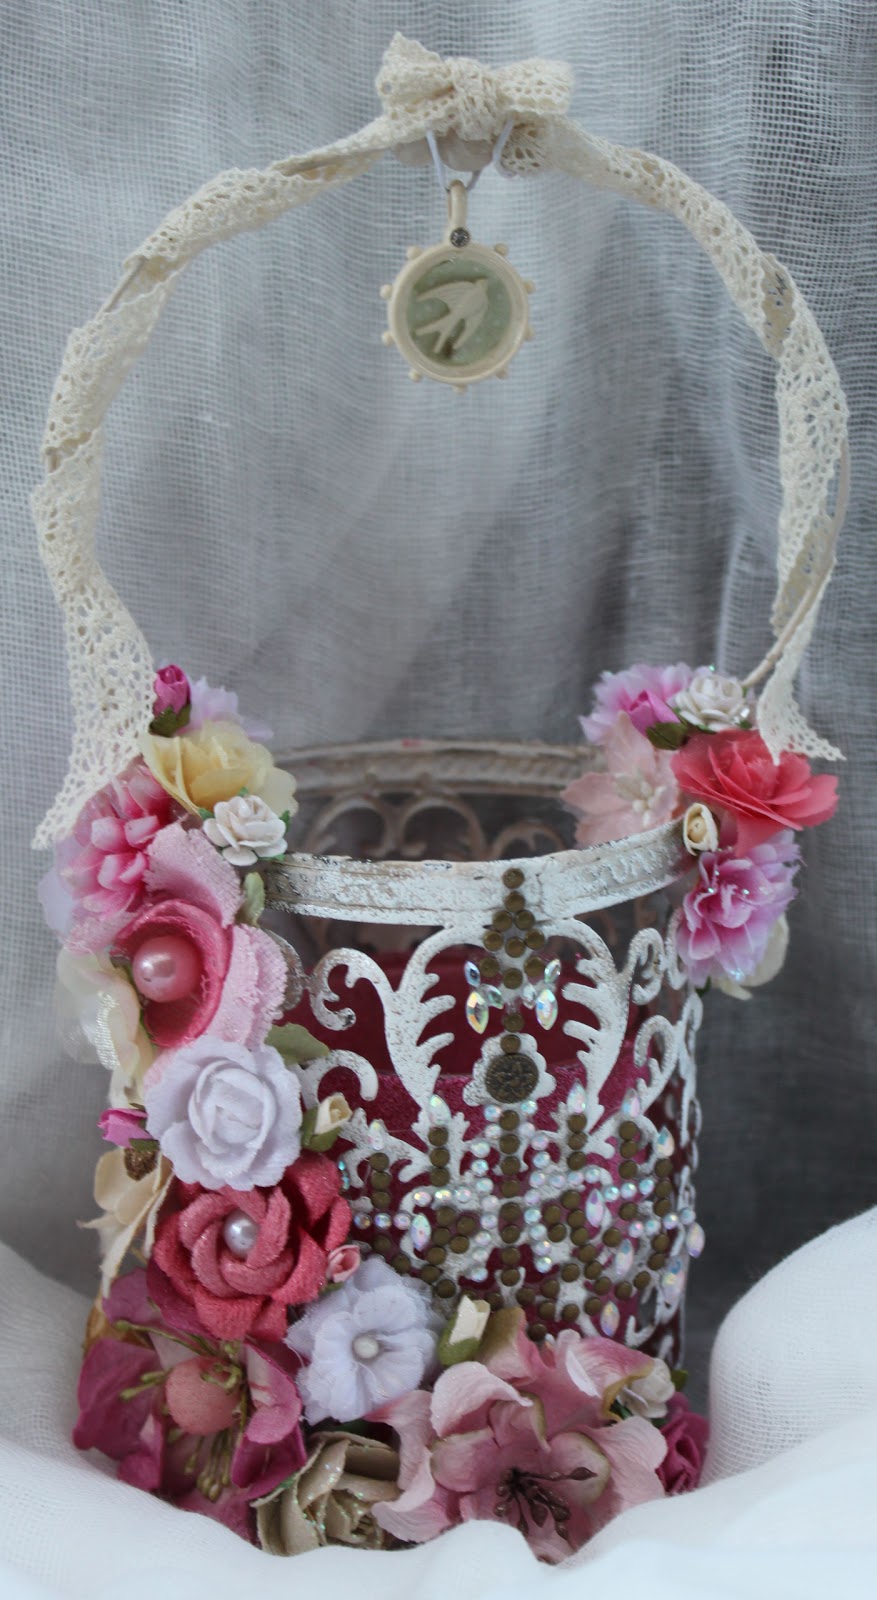
Hi everyone!! Today I wanted to share with you all a gorgeous little tealight Candle holder that I have altered using an array of WOW Embossing Powders and a tonne of Prima Marketing Flowers & Bling.


This is how I bought the candle holder from a local Chemist a million moons ago...


The glass jar inside the holder has been coated with a mixture of Pink Coloured WOW Embossing Powders. Including Bubblegum, Magenta & Whirly Pop.


The beautiful Prima Rhinestone Chandelier looks amazing with the Flower Cluster


I roughly rolled the edges of the holder in my Embossing Ink Pad and then added some Bright White Opaque Embossing Powder then heated. I love how it looks with the cream popping through.

  
This beautiful lace from my stash was simply adhered using some Helmar 450 glue and then loosely spiraled around the handle. The charm is a Resin Treasure from Prima Marketing's Songbird Collection.


A couple more closeups so you can really see that amazing Embossing Powder effects on both the outside and the Glass Jar inside. 


And here she is lit up glowing. This photo was taken in daylight so you cannot see the warm pink tones that the light omits. This is truly a beautiful piece that I will cherish.


Thanks so much for looking and don't forget that I love comments! 

Until next time....Happy Scrapping.

Amy Prior xxxx

Friday, April 6, 2012

A2Z Scraplets April Colour Challenge


Good morning everyone! Well this month I wanted to shake it up a bit and offer a Colour Challenge for you all instead of our regular sketch challenges. Below you will see a beautiful palette from www.seeds.com and for this challenge, you are required to create a layout or card using the colours from this palette only! You can add some neutral colouring like white, black & kraft but we should be able to see all these beautiful colours in your project.


As per usual there is the opportunity to win 1 of 3 fabulous A2Z Scraplets Goody Packs and you have to be in it to win it! There is a linky widget on the right side of the A2Z Scraplets Blog. Be sure to add your link to your layout there. 

Since bringing the fabulous A2Z Scraplets blog over from Typepad to Blogger, we have had a drastic drop in Challenge entries and this unfortunately means that these challenges may soon end if there is no longer an interest in them. Because I need your help to get this party started once again, I have on offer an AMAZING pack of brand new A2Z Scraplets valued at over $25 to send out to one lucky blog follower and it is so easy to enter! YES this is on top of the fabulous challenge prizes up for grabs! To enter in my super awesome personal giveaway that Julie doesn't even know about so shhhhh LOL all you have to do is spread the love! I want you all to spread the A2Z Scraplets love far and wide to all your Scrappy Friends and make sure that they comment here on the A2Z Scraplets blog saying that YOU sent them there. They will also need to become a follower for the entry to be legitimate and if we get lots and lots of new love I might just think about a second personal giveaway! You will have the entire month of April for this and be sure to let your friends know that of course they can enter too! 

Okie Dokie ladies and gents, after all that excitement here is my example layout with a couple of closeups.


I have used the gorgeous Follow Your Heart Collection from My Minds Eye designed by Rhonna Farrer. Oh my gosh I am in love with this entire collection and I want to use it for every single layout because every piece of the collection is exquisite! Now of course I have always been a HUGE fan of Rhonna's. I own every single on of her Digital Collections as well as her 100 Creative Exercises is my mojo in jar but this collection designed for My Minds Eye is definately my favourite so far from Rhonna and I cannot wait for her to keep WOWing me over and over again in the future.


The Adorable Chipboard title is of course an A2Z Scraplets piece that I have simply inked with Pale Pink Chalk Fluid Ink and then I have stamped over the top with a Linen Background Stamp from Stampin Up. The texture is not as visible in the photo as it is real life but it is a nice subtle effect that looks like fabric I love it!


To bring more of the pink tones in the palette I misted the background paper with a little Pink Bubblegum Glimmer Mist from Tattered Angels and this of course added that shimmer that every single project by me simply must have LOL


Lastly I added some Paper Strips curled up  to create little ruffled banners. I have actually stapled these down since taking this photo and they look even cuter if possible!

Thanks so much for looking and don't forget to head on over to www.a2zscraplets.blogspot.com.au to become a follower and get into the draw to win one of 4 huge prize giveaways this month!

Until next time....happy scrapping!


Thursday, April 5, 2012

Cardabilities #52

Howdy everyone! I hope you are all fabulous and not too busy with the lead up to Easter. I have 2 very excited little girls in my house waiting for the Furry Bunny to arrive on Sunday LOL. 

Today I have a new fabulous sketch to share with you all from the talented Karen Gerber from Cardabilities and I am sad to say this is my last sketch on the Cardabilities Design Team but of course will not be the last time I play along and the new Design Team looks fantastic so I cannot wait to see what they come up with for each of the new sketches.

So here is Sketch #52....


And here is my take with some closeups of course :)


I made this gorgeous card for my daughters' best friend at school Tayla. It was her birthday party last Friday night and the girls had such a blast! For this card I have used the Echo Park Springtime Collection along with some Wafer Thin Dies from Spellbinders, My Favorite Things & Quickcutz.


I have used lots of Distress Stains as well that are available to purchase from Passion 4 Paper store here as well as some beautiful Perfect Pearls Mist over the entire card to give it lots of shimmer but subtley. You can also purchase a fabulous range of dies from Passion 4 Paper here.

Thanks so much for looking and be sure to head on over to Cardabilities to join in the fun too! You could be our next featured designer.

Until next time.....happy scrapping!